|
|||
|---|---|---|---|
| # of Zones | 3 | ||
| Occupants | |||
| Worm Anchorite Necromancers (1 boss-level Necromancer) |
|||
| Important Treasure | |||
| 1 boss-level Coffin | |||
| Console Location Code(s) | |||
| DarkFissureExterior, DarkFissure, DarkFissure02, DarkFissure03 | |||
| Region | |||
| Valus Mountains | |||
| Location | |||
| Southeast of Cheydinhal, east of the Reed River | |||
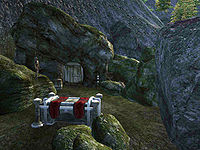
Dark Fissure is a medium-sized cave southeast of Cheydinhal containing necromancers (quest-related). It contains three zones: Dark Fissure, Dark Fissure Tunnels, and Dark Fissure Inner Sanctum.
Related Quests
- Necromancer's Moon: Find out about Black Soul Gems.
Notes
- This cave contains 8 Cairn Bolete plants and 19 Wisp Stalk plants.
- This cave can be entered, fully explored and all items retrieved without starting the related quest. In this case, however, the Worm Anchorite involved with the quest and the Handwritten Note he carries won't appear either outside or inside the cave.
Exterior
- The exterior is located at coordinates: Tamriel 34, 16
- This location's map marker (M on map) is named Dark Fissure (editor name DarkFissureMapMarker). The entrance door is E of the marker, 90 feet away.
- 0-1 Bandit Enemy (each 50% probability melee , 25% archer Bandit, 25% Dog) is near the entrance
- The following plants can be found near the entrance: 5 Bergamot plants, 13 Clouded Funnel Cap plants, 2 Monkshood plants, 5 Motherwort plants, and 33 Tinder Polypore plants
- 1 Necromancer Altar is at location A on map
- Three Zombie corpses are found outside the cave: one is positioned at the top of the slope leading downhill, one is laid on top a rock just to the right of the door to enter the cave (C), and one is hanging directly above the door, although you will not be able to claim a Mort Flesh sample from the latter.
Zone 1: Dark Fissure
You start in this zone at an intersection. To the right is a passage to the door (C) leading to the next zone; to the left is the main part of the current zone where you will find all the enemies, treasure and the key to the second zone.
In the first room you enter is a staircase that leads downwards to another room which contains two chests, a dead Skeleton and one or two occupants. Halfway through the passage that links the two main chambers is a locked prison cell (E) occupied by an Undead. In the second room you can find a small living area which consists of assorted furniture, a bed (b) and a Fine Chest (k) holding the key to Dark Fissure Tunnels.
Occupants:
- 1 Worm Anchorite (carries Handwritten Note, two empty lesser soul gems)
- 4-7 Necromancer Enemies (each 50% probability Necromancer, 50% Undead)
- 1 Undead
Treasure:
- 3 Chests 01 (1 locked)
- 2 Chests 03
- 1 Fine Chest (contains Dark Fissure Cell Key; non-respawning) at location k on map
- The following books will always be found: 1 The Argonian Account, Book 2
- The following plants will always be found: 3 Cairn Bolete plants and 9 Wisp Stalk plants
Doors and Gates:
- There are two doors in/out of this zone
- 1 door (at Out) leads outside
- 1 door (at C) leads to the zone Dark Fissure Tunnels (locked, opened by Dark Fissure Cell Key)
- 1 A Rusty Door at E (locked)
Other:
- 1 bed at location b on map
Zone 2: Dark Fissure Tunnels
This zone, unlike the other two, is fairly straightforward. Simply make your way through the chambers and passages until you reach the entrance to the third level (D). There are two small rooms that are located slightly off course but are easily identifiable.
To reach the chest in the first (long rectangular-shaped) room, you will need to jump up onto a ledge which is above the entrance you came in from.
Occupants:
- 6-10 Necromancer Enemies (each 50% probability Necromancer, 50% Undead)
- 1 Nuisance Animal
Treasure:
Doors and Gates:
- There are two doors in/out of this zone
- 1 door (at C) leads to the zone Dark Fissure
- 1 door (at D) leads to the zone Dark Fissure Inner Sanctum
Zone 3: Dark Fissure Inner Sanctum
Like the first zone, this final one has an intersection right at the beginning. Head left and you will end up in a large chamber with a chasm running through the middle. Be sure to loot the half-buried chest on the far right and to explore the far northern side of the chamber before jumping down. Move clockwise until you arrive in a large room which holds the boss chest (B) and the boss-level Necromancer (A). Nearby are also two stone Sacrificial Altars (b), which can be used as beds. Keep proceeding in the loop and you will eventually end up near door D.
Occupants:
- 1 boss-level Necromancer at location A on map
- 2-5 Necromancer Enemies (each 50% probability Necromancer, 50% Undead)
- 0-1 Undead
Treasure:
- 1 boss-level Coffin (Necromancer variety) at location B on map
- 3 Chests 01 (1 locked)
- 3 Chests 03
- 1 Chest 04
- The following plants will always be found: 5 Cairn Bolete plants and 10 Wisp Stalk plants
Doors and Gates:
- There is one door (at D) in/out of this zone, leading to the zone Dark Fissure Tunnels
Other:
- 2 Sacrificial Altars (can be used as beds) at locations b on map
