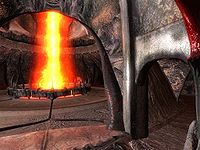
| Oblivion Tower: The Dreaded Refuge |
|
|---|---|
| # of Zones | 3 |
| Important Treasure | |
|
|
| Console Location Code | |
| OblivionRDCitadel02 OblivionRDCitadel02Hall01 OblivionRDCitadel02Lord |
|
The Dreaded Refuge is a small Sigil tower, and one of five randomly chosen Sigil Keeps.
This tower can be visited when accessing the Main Tower from Oblivion Worlds 1, 3, 5, 6 or 7. In order to reach the Sigil Stone on top of this tower, you are only required to pass through one hallway before reaching the Sigillum Sanguis. The only loot in this tower can be found in the Sigillum Sanguis.
Zone 1: The Dreaded Refuge
This tower only consists of two levels. One ground level and one upper level. When entering you can turn either left or right for a Magicka Essences, but you will have to cross the chamber to get to the door to the Rending Halls. There are only two Daedra on your path, so it shouldn't be too difficult.
The first level is basically one path winding upwards, where you'll meet a few Daedra on the way. Once you're at the top you can use one of the two doors to enter the Sigillum Sanguis.
Occupants:
- Ground level: 2 Daedric occupants (Daedra creatures or Dremora)
- First level: 4 Daedric occupants
Traps:
- Falling in the pool of lava in the middle of the ground level will result in instant death.
- Touching the fire pillar in the middle of the room will result in instant death.
Doors and gates:
- There are five doors in/out of this zone
- 1 door (at Out, ground level) leads outside to the Planes of Oblivion
- 1 door (at A, ground level) leads to Rending Halls
- 1 door (at B, first level) leads to Rending Halls
- 2 doors (at C, first level) lead to Sigillum Sanguis
Other:
- 2 Magicka Essences at locations m on map
Zone 2: Rending Halls
These halls are straightforward climb upwards. You will meet some resistance halfway, in the form of some Daedra and Citadel Spikes. There is also a Blood Fountain that can help you replenish your health.
Occupants:
- 3 Daedric occupants (Daedra creatures or Dremora)
Traps:
- 5 Citadel Spikes at locations s on map
Doors and gates:
- There are two doors in/out of this zone
- 1 door (at A) leads to The Dreaded Refuge (ground level)
- 1 door (at B) leads to The Dreaded Refuge (first level)
Other:
- 1 Blood Fountain at location b on map
Zone 3: Sigillum Sanguis
Ascend the ramp and pass through the opening to find yourself in the room that contains the Sigil Stone. After climbing to the second level you will encounter two Dremora. Here you can also find a Magicka Essences and a Blood Fountain. At the top you will find a boss-level Dremora and one boss-level The Punished. Be careful if you are sneaking that the Daedra can spot you easier than that you're used to, due to the openness of the area. Once you have reached the top you can grab the Sigil Stone to close the Oblivion Gate.
Occupants:
- 1 boss-level Dremora (always best possible level) at location B on map
- 2 Dremora
Treasure:
- 1 boss-level The Punished at location C on map
- 1 random Sigil Stone at location S on map
Traps:
- Touching the fire pillar in the middle of the room will result in instant death.
Doors and gates:
- There are two doors in/out of this zone
- 2 doors (at A) lead to The Dreaded Refuge
Other:
- 1 Blood Fountain at location b on map
- 1 Magicka Essences at location m on map
