| This page is currently being redesigned for the Oblivion Places Redesign Project (OPRP). The page needs in-game walkthrough(s) to go along with the maps and content lists. If you make an addition to this page, please update this template accordingly, but make sure you have observed the project guidelines. Needs in-game verification. See the OPRP project page for explanation of what needs to be to complete the verification process. |
|
|||
|---|---|---|---|
| # of Zones | 3 | ||
| Occupants | |||
| Monsters | |||
| Important Treasure | |||
| 1 boss-level Chest | |||
| Console Location Code(s) | |||
| FyrelightCaveExterior02, FyrelightCave, FyrelightCave02, FyrelightCave03 | |||
| Region | |||
| West Weald | |||
| Location | |||
| West of Skingrad on the Gold Road and south of Meridia's Shrine | |||
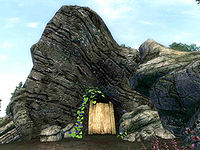
Fyrelight Cave is a medium-sized cave between Skingrad and Kvatch containing monsters. It contains three zones: Fyrelight Cave, Fyrelight - Deep Canyon, and Fyrelight - The Lost Sump.
Notes
- This cave contains 15 Cairn Bolete plants and 56 Wisp Stalk plants.
Exterior
- The exterior is located at coordinates: Tamriel -24, -2
- This location's map marker (M on map) is named Fyrelight Cave (editor name FyrelightCaveMapMarker). The entrance door is S of the marker, 130 feet away.
- 0-2 Monsters are near the entrance
- 1 Wilderness Creature (Forest variety) is near the entrance
- The following plants can be found near the entrance: 26 Alkanet plants, 2 Blackberry bushes, 4 Cinnabar Polypore plants, 6 Columbine plants, 4 Elf Cup plants, 27 Flax plants, 17 Lady's Smock plants, 6 Morning Glory plants, 10 Motherwort plants, 8 Nightshade plants, 11 Peony plants, 3 Primrose plants, 1 Strawberry bush, and 5 Viper's Bugloss plants
Zone 1: Fyrelight Cave
If you enter the cave from the door on the hill, you can travel through all of the zones of the cave provided you have some lock picking skill, the Skeleton Key or an Open spell. If you came from the lower entrance you will pass through a long corridor with some rooms until you reach the Deep Canyon section.
When you enter through the main entrance, you first arrive in a very large cave room. There are two enemies above you which can be alerted pretty easily, so be careful. If you go right from the big room and jump down the hole, you'll end up in a dead end. If you go left, you encounter a series of rooms leading to the Deep Canyon section. Watch out for the Swinging Mace trap at I on the way.
Occupants:
Treasure:
- 1 Chest 01 (locked)
- 2 Chests 03
- 1 Chest 04
- The following plants will always be found: 9 Cairn Bolete plants and 18 Wisp Stalk plants
Traps:
- 1 Pressure Plate trigger at location H on map
- 1 Swinging Mace trap at I
Doors and Gates:
- There are four doors in/out of this zone
- 2 doors (at C and D) lead outside
- 2 doors (at E and F) lead to the zone Fyrelight - Deep Canyon (locked, opened by Fyre Light Cave Key)
Zone 2: Fyrelight - Deep Canyon
If you came from the secondary entrance or jumped down the hole in the first zone, you can travel through the bottom of the chasm, which leads to a room containing a chest with the key that unlocks the last zone of this cave. From this room, you must backtrack to reach the rest of the cave. There is also a boss chest to the left as you enter the area (at B).
From the unmarked cave entrance you can reach the upper level of the large room in this zone. If you jump across the gap, you will find two treasure chests and one or two enemies. The door to The Lost Sump is located here as well, but it is locked.
Occupants:
Treasure:
- 1 boss-level Chest (Monster variety; locked) at location B on map
- 2 Chests 01 (1 locked)
- 1 Chest 02
- 1 Wooden Chest (contains Fyre Light Cave Key; non-respawning) at k
- The following plants will always be found: 3 Cairn Bolete plants and 14 Wisp Stalk plants
Doors and Gates:
- There are three doors in/out of this zone
- 2 doors (at E and F) lead to the zone Fyrelight Cave
- 1 door (at G) leads to the zone Fyrelight - The Lost Sump
Zone 3: Fyrelight - The Lost Sump
This zone has another hall with a canyon, but this time the canyon is flooded. On the other side is a circle of rooms. There is a chest located beneath a dead treasure hunter at H. You can backtrack to the big room and swim down the flooded canyon to find a room with two chests.
Occupants:
Treasure:
- 4 Chests 02 (2 locked)
- 1 Chest 03
- 2 Chests 04
- The following plants will always be found: 3 Cairn Bolete plants and 24 Wisp Stalk plants
Doors and Gates:
- There is one door (at G) in/out of this zone, leading to the zone Fyrelight - Deep Canyon
Other:
- 1 Dead Treasure Hunter (carries light armor, one weapon, unenchanted loot) at location H on map
