|
|||
|---|---|---|---|
| # of Zones | 1 | ||
| Occupants | |||
| Draugr | |||
| Important Treasure | |||
| Words and Philosophy Thief |
|||
| Console Location Code(s) | |||
| SilverdriftLair01 | |||
| Region | |||
| The Pale | |||
| Location | |||
| East-southeast of Fort Dunstad Northwest of Nightgate Inn |
|||
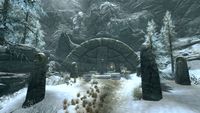
Silverdrift Lair is a medium-sized Nordic ruin located east-southeast of Fort Dunstad and northwest of Nightgate Inn. The ruins are inhabited by draugr. It contains one zone: Silverdrift Lair.
Related Quests
- Note: This location is one of many potential targets for one or more of the radiant quests found on this page.
Walkthrough
Exterior
There are two bandits guarding the entrance of the ruin.
Silverdrift Lair
Two dead bandits flank a cooking spit in the first room. There is a large urn and a set of shelves holding an iron helmet against the south wall. There are empty wine bottles and tankards throughout this ruin. A passage heads east with a dead bandit by a T-junction and a hanging rack holding two rabbits and a pheasant above. The passage to the east is blocked by a barred door. On the left, among some rubble is a medium coin purse and some random armor. The passage to the north is patrolled by a draugr, it leads to an iron door.
A draugr will greet you on the other side of the door. There are sets of shelves to the north and two to the south holding mainly clutter, except for a random potion of healing on the upright shelves to the south. There are two sideboards by pillars near the middle of the room with a dead bandit on the floor between them, on the right-hand sideboard is an iron mace with an iron shield leaning against it. An embalming table opposite the door adorned with candles holds another random potion of healing, a random potion of magicka, and a copy of the Two-handed skill book Words and Philosophy.
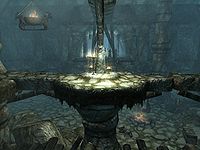
The next room has multiple levels, with a walkway to the left of the embalming table, that links with others that lead to the far side of the room and with spiraled wooden ramps that descend to the lower level. A matching walkway to the right of the table has collapsed. There is a caged walkway far above running east-west. A draugr magic-user patrols the lower level near a campfire and a throne. There is an apprentice-locked chest beside the campfire, to the left of this is a rack with two more rabbits and another pheasant. There is another dead bandit beside the fire. If you look west from the fire, under the balcony you came down from, you'll see a sort of wooden wall. Behind this wall is a bedroll and an unlocked chest. Northeast of the fire, you'll find two urns and another barred wooden door. From here, you can either take the detour for more loot through a concealed door on the ground floor to the west, or head for the word wall by going over the second-level walkway to the east.
In the middle of the west wall is a short passage with an oil slick and an oil lantern hanging above. There are two rune totems; one showing a snake and the other a whale, both have handle in the top. The answer is high on the wall concealed by the oil lantern. Pulling the whale opens a concealed door, while pulling the snake releases the lantern which ignites the oil slick. Behind the door is a tunnel that twists and turns. You can disarm this trap by igniting the oil before stepping into the area.
The tunnel is covered in light webs that can be walked through and ends in a room containing two upright sarcophagi in the middle. There are three further upright sarcophagi around the walls, none of which contain draugr. On the floor in front of the sarcophagus to the north are three loose septims. A sideboard in the northwestern corner has a random potion of extra magicka on top. A doorway to the east leads to a typical brightly lit catacombs, with two upright sarcophagi either side of a central pillar patrolled by two leveled draugr. A table to the southeast holds an expert-locked chest, a random pair of boots and random cuirass.
A northeastern doorway leads to the next room, which has three two-part sections. One part of each section has a handle that opens a rotating door into the other part. The northern handle reveals a small room with a chest with some minor loot as well as a random greatsword, a random shield, and three coin purses. The middle handle opens the way to a draugr. The southern handle leads to a hallway that turns south and leads to a door with a bar blocking it. Raising the bar and opening it leads back to the multi-leveled room with the campfire.
Crossing the walkways to the east leads to a second balcony. Take care as there are two pressure plates that trigger spike wall traps. There are also two draugr just past the traps, one of whom is leveled and equipped with a leveled bow, and may also possess a melee weapon; with correct timing and planning the spike walls can be used to help take down both of the draugr. In the center of the east wall is a doorway blocked by spears, the handle to lower these is on a stone pillar on your right as you approach. Before passing through the doorway, to the south is a pedestal with an enchanted helmet on a weight sensitive plate. Taking the helmet triggers a spear trap from the floor. To avoid damage either knock the helmet off with a bow, ranged magic or the use of telekinesis to retrieve it.
Through the doorway to the east is a short passage leading to an iron door. Through the door is a room guarded by a draugr. There is an unlocked chest and random potion of healing on a stone table, with a dead bandit laying on a bedroll to the right. There is an iron shield on the floor beside the bandit. To the left of the table is a small empty alcove blocked by an adept locked gate. To the south is a gate that is raised by pulling a chain to the left, take care by standing to the side as opening it will trigger a battering ram from behind the gate.
Through the gate the passage turns first west and then north, while ascending several flights of stairs. At the top is a room with a long dining table with benches along both side and a couple of leveled draugr. There is a leveled sword, that may be enchanted and charred skeever hide on the table, with a dead bandit to the right of it. To the north is another passage which takes a couple of turns as it climbs more stairs. A draugr is guarding the room at the top, which contains a wooden table with a random potion of stamina and a random shield on top and a sideboard with an unlocked chest atop. To the right of this is a copy of the Pickpocket skill book Thief on the ground, between two skeletal hands with a skull above. There are two bed rolls in the room; one on your right as you enter, the other which has a dead bandit on it is between the table and chest. The exit is in the southwestern corner.
The passage descends several flights of stairs to an unlocked gate at the bottom. Through the gate is caged walkway high above the main chamber. A leveled draugr will be waiting with a leveled bow and a melee weapon on the far side of the bridge. On the far side the passage turns south, and head up some more stairs. The iron door at the top leads to the room containing the word wall.
The room is guarded by two draugr; one is a leveled draugr, the other is a leveled boss draugr or dragon priest. The boss draugr will almost always be located in front of the word wall. There are two flame spout traps and two dead bandits on the floor between you and the wall. The second draugr is on a raised platform to the left as you enter. To reach it you need to climb stairs on the right, passing two opened upright sarcophagi and crossing a bridge. There is a third open sarcophagus by the second draugr containing a skeleton you can loot and a random helmet. The boss leveled draugr may raise the bandits to assist in the fight. If you defeat one of them, they will thank you as they disintegrate. There are several plinths around the room, but they only hold ruined books.
Once you manage to defeat the draugr, the word wall teaches a word for the Disarm shout. There is an iron door to the west with a passage leading to a small room behind. The next room contains two large urns and an unlocked boss level chest. A gate on your right is opened by a chain to the left of the chest. Stairs lead down from here and around the corner to the other barred door found previously, which opens up into the first hallway you entered.
Notes
- Two quicksilver ore veins are located 200 ft northwest of the lair on a cliff (head to the right when exiting the lair and stick to the rocks to your right until you see path up to the small plateau).
Bugs
- In the main chamber of the first zone, there's a lit brazier in an alcove on the eastern wall of the ground floor. It is possible to jump behind this torch and get stuck with no legitimate way to escape.
- Summoning an atronach beneath your feet, should you become trapped in this space, may slowly push you out with creative jumping and a little luck, allowing you to escape (confirmed with a storm atronach).
- The barred door will open from the wrong side, but, as the bar will still be in place, there is no way to raise the bar to go backwards through the ruin.
- The wall might not teach you a Word. This can prevent further information about Words of Power via the Greybeards, or letters from friends.
- After exiting the ruins through the shortcut, you may fall into a crevice with no way out. ?
- Fast travel to another location to escape.

