|
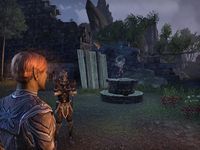
| A powerful mage named Rurelion went missing in the Temple of the Mourning Springs. I agreed to help his apprentice Gathwen search the temple for signs of her master. |
Quick Walkthrough
- Talk to Gathwen.
- Talk to the skeleton at the courtyard's entrance.
- Disrupt the Wards to enter the Catacombs.
- Find Rurelion in the central courtyard, then disrupt the ritual.
- Follow the spirit further into the ruin.
- Make your choice.
Detailed Walkthrough
An Expedition Gone Astray
Arriving on Khenarthi's Roost and speaking to Razum-dar will give you two miscellaneous objectives, one of which is to investigate the Temple of the Mourning Springs. While in Eagle's Strand, you may also run across Ealcil, a scholar studying a mysterious weeping stone taken from the temple. However, by merely passing within a certain distance of the temple, which is located on the east side of Khenarthi's Roost, Gathwen will approach you and ask for your help, starting the quest.
Gathwen will explain that, as part of an expedition from Eagle's Strand, she and her master, Rurelion, were exploring the temple. However, the others fled with undead started attacking them, and Gathwen was separated from Rurelion. He has not returned, and so she needs help searching for her master.
The only way inside the ruins is to disable the Scorpion and Spider Wards in the courtyard, so ascend the steps. The archway will be blocked by a skeleton in rags. Speak to him to discover that he is actually a spirit that switches bodies as he wills, and now he has claimed Rurelion's body for his collection. He'll invite you to become part of his wardrobe as well, then fade away.
The Temple of the Mourning Springs
Enter the courtyard proper and find the Spider and Scorpion Wards on the south and north sides of the area, respectively. Many skeletons will attack you on the way, including warriors, archers and cyromancers. Examine the Wards and Gathwen, who has been following you, will disrupt them. Once both are disabled, the entrance to the Catacombs will open. It is a trapdoor on the western side of the courtyard there are more then one trapdoors to the Catacombs. They are gaurded by more skeletons.
The Catacombs consists of a large room with a simple puzzle along one wall. There are four pillars with etchings on them; each pillar has a different symbol corresponding to a phase of the moons. To proceed, activate the pillars in order: New, Waxing, Full, Waning. They will light up if the correct sequence is followed; if not, you will get a mild shock (but no damage).
Talk to Gathwen, who will remind you of Rurelion's importance to the Dominion, then enter the Central Ruins.
You will find an Altmer standing like a statue atop a pedestal in this outdoors area. He is identified as Rurelion when you activate him to talk, but in dialogue his true nature is revealed: he is Uldor, an ancient Maormer sorcerer once sealed in the ruins, who was set free by Ealcil's removal of the Mourning Stone. When you demand Rurelion's release, Uldor will summon skeletons from the bone piles surrounding the pedestal. It is up to you to defeat the rising dead while Gathwen uses her magic to disrupt the summoning. Once all four piles are sealed, find Uldor again and discover that Rurelion is trying to fight his possessor off.
Uldor will flee down the stairs into the Great Hall.
Confront Uldor
The Great Hall is populated by giant bats, but it also contains deadly spike traps in the floor, so dodge both dangers on your way to the far end of the hall, where Rurelion is wresting control back from Uldor. Once the Altmer is himself again, disable the traps using the nearby lever.
Talk to Rurelion, who will reveal that he sensed Uldor's thoughts while being controlled: the Maormer plans to raise an undead army and enslave Khenarthi's Roost by "wearing" everyone at the same time. Rurelion will explain that Uldor's weakness is the Mourning Stone; therefore, the Mourning Stone must be restored to the temple. Choose "I'm ready to face Uldor," and Gathwen will arrive. She will tell you what Rurelion left out: he plans to seal himself away with Uldor to prevent his escape.
Gathwen will beg you to let her take her master's place, as Rurelion is so important to the Dominion. You must choose who to save: the young, full-of-promise Gathwen, or the valuable, but old Rurelion.
Whoever you choose, go up the stairs and enter Uldor's Tomb. In the main chamber, Rurelion/Gathwen will approach Uldor and deceive him into possessing them. Though he is held in place, Uldor will summon bolts of lightning to strike you as you move around the room, placing the tears of the two moons on the four pedestals. The lightning can easily kill low-level players, but it is heralded by red circles where it will strike the ground, so avoid those.
When all four tears are in place, spouts of water will surround Uldor's body, and Rurelion/Gathwen will be lying against the stone slab. Speak to him/her and they will tell you to return to the Central Ruins, where whoever you saved will be replacing the Mourning Stone and finally sealing Uldor (and your sacrifice) away for good. Do as you are bid, and you will receive the Mourning Bow and some gold as your reward, and be able to return to the courtyard via a portal. Many spirits will be gathered there now that Uldor is gone.
Quest Stages
{{ Predefinição:FULLPAGENAME0/Line|!|Tears of the Two Moons}} {{Predefinição:FULLPAGENAME0/Line|1=|2=
}}{{Predefinição:FULLPAGENAME0/Line|1=|2=
}}{{Predefinição:FULLPAGENAME0/Line|1=|2=
}}{{Predefinição:FULLPAGENAME0/Line|1=|2=
}}{{Predefinição:FULLPAGENAME0/Line|1=|2=
}}{{Predefinição:FULLPAGENAME0/Line|1=|2=
}}{{Predefinição:FULLPAGENAME0/Line|1=|2=
}}{{Predefinição:FULLPAGENAME0/Line|1=|2=
}}{{Predefinição:FULLPAGENAME0/Line|1=|2=
}}{{Predefinição:FULLPAGENAME0/Line|1=|2=
}}{{Predefinição:FULLPAGENAME0/Line|1=|2=
}}{{Predefinição:FULLPAGENAME0/Line|1=|2=
}}{{Predefinição:FULLPAGENAME0/Line|1=|2=
}}{{Predefinição:FULLPAGENAME0/Line|1=|2=
}}{{Predefinição:FULLPAGENAME0/Line|1=|2=
}}{{Predefinição:FULLPAGENAME0/Line|1=|2=
}}{{Predefinição:FULLPAGENAME0/Line|1=|2=
}}{{Predefinição:FULLPAGENAME0/Line|1=|2=
}}{{Predefinição:FULLPAGENAME0/Line|1=|2=
}}{{Predefinição:FULLPAGENAME0/Line|1=|2=
}}{{Predefinição:FULLPAGENAME0/Line|1=|2=
}}{{Predefinição:FULLPAGENAME0/Line|1=|2=
}}{{Predefinição:FULLPAGENAME0/Line|1=|2=
}}{{Predefinição:FULLPAGENAME0/Line|1=|2=
}}{{Predefinição:FULLPAGENAME0/Line|1=|2=
}}{{Predefinição:FULLPAGENAME0/Line|1=|2=
}}{{Predefinição:FULLPAGENAME0/Line|1=|2=
}}
| Finishes Quest | Journal Entry |
|---|
| Prev: Storm on the Horizon | Up: Aldmeri Dominion Conc: Cast Adrift |
Next: The Perils of Diplomacy |
