|
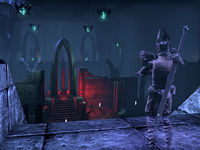
| This tower is a lightless oubliette, a prison of darkness that binds King Laloriaran Dynar, the last Ayleid King. |
Quick Walkthrough
- Collect and place the three crystals.
- Destroy the two receivers binding the Ayleid King by rotating crystal prisms.
- Talk to the king.
- Enter the portal to the Hollow City.
- Enter the Fighters Guild Training Grounds.
- Talk to the king.
Detailed Walkthrough
You need to first unlock the door to the Ayleid King's prison.
The Crystal Puzzle
Enter the Lightless Oubliette tower. You need to recover three crystals: Lifeshadow, Mindshadow and Flameshadow Crystals.
The Mindshadow Crystal is at the south end of the room, in the library. Take the red crystal at the southernmost end, then use the library gate switch for a quick way back into the main area.
The Flameshadow Crystal is inside the Frozen Alcove. Take the red crystal from the end of the Alcove. Once you do, the Frozen Alcove will begin to melt as lava seeps in through the floor.
The Lifeshadow Crystal is at the north end of the room, in the garden. Take the crystal at the bottom of the stairs, then use the library gate switch at the top to exit quickly.
From left to right, place the Mindshadow, the Flameshadow and the Lifeshadow Crystals. You can place the crystals whenever you want; you don't have to collect all three, then place them.
After the crystals are in place, enter the Ayleid King's prison and set him free.
The Prism Puzzle
Activate the first crystal prism to the left. Follow the light beam to the last crystal, the third lit one, and press it three times. Press the crystal that lights up five times. Repeat this process of activating the last lit crystal until the next one lights up until all the crystals are lit, and the prompt destroy the north receiver is complete.
Next, you need to do the same thing to the south receiver. Place the light of Meridia in the crystal prism in the southeast corner, then rotate the crystals around. For the second crystal from the southern receiver, make sure the beam of light is headed to the crystal closest to the receiver.
Destroying both receivers frees the King. Talk to him, then follow him as he limps to the eastern side of the room and opens a portal to the Hollow City.
The Hollow City
Enter the door to the Fighters Guild Training Grounds, then climb the stairs and talk to the King.
Notes
- The Light of Meridia can be used within the ruin to brighten the area. Passing near an Essence of Darkness will dispel the light.
Quest Stages
{{ Predefinição:FULLPAGENAME0/Line|!|Light from the Darkness}} {{Predefinição:FULLPAGENAME0/Line|1=|2=
}}{{Predefinição:FULLPAGENAME0/Line|1=|2=
}}{{Predefinição:FULLPAGENAME0/Line|1=|2=
}}{{Predefinição:FULLPAGENAME0/Line|1=|2=
}}{{Predefinição:FULLPAGENAME0/Line|1=|2=
}}{{Predefinição:FULLPAGENAME0/Line|1=|2=
}}{{Predefinição:FULLPAGENAME0/Line|1=|2=
}}{{Predefinição:FULLPAGENAME0/Line|1=|2=
}}{{Predefinição:FULLPAGENAME0/Line|1=|2=
}}{{Predefinição:FULLPAGENAME0/Line|1=|2=
}}{{Predefinição:FULLPAGENAME0/Line|1=|2=
}}{{Predefinição:FULLPAGENAME0/Line|1=|2=
}}{{Predefinição:FULLPAGENAME0/Line|1=|2=
}}{{Predefinição:FULLPAGENAME0/Line|1=|2=
}}{{Predefinição:FULLPAGENAME0/Line|1=|2=
}}{{Predefinição:FULLPAGENAME0/Line|1=|2=
}}{{Predefinição:FULLPAGENAME0/Line|1=|2=
}}{{Predefinição:FULLPAGENAME0/Line|1=|2=
}}{{Predefinição:FULLPAGENAME0/Line|1=|2=
}}{{Predefinição:FULLPAGENAME0/Line|1=|2=
}}
| Finishes Quest | Journal Entry |
|---|
| Este artigo relacionado a Elder Scrolls Online é um rascunho. Você pode ajudar expandindo-o. |
